Introduction
The idea of doing Alpamayo Circuit in an independent way has been on our minds for a long time. Finally, we fulfilled this little dream and this trekking became history for us. We do not like to evaluate but there is no doubt that it is the first rate when it comes to beautiful mountain crossings. Although there are some materials about the logistics of its passage in the Internet but they are not always complete and up-to-date. That is why we decided to gather our experiences and describe them here. We think that they can be useful for those who plan to do this hike themselves. However, if you are going with a tourist agency, you do not have to worry about anything and you can easily skip this text.
Orientation, infrastructure and supplies
The trail does not have any marks. Only on the section coinciding with Santa Cruz from time to time appear information plates. However, in good weather and with a bit of experience orientation is not difficult. Paradoxically it appears that some doubts could be present in the lower parts: in the vicinity of the settlements of Quechua (a lot of human and animal paths) and on pampas (here, in turn, the paths disappear in marshy ground).
Suggested map: Alpenverreinskarte, Cordillera Blanca Nord 0/3a
Suggested guidebook: Bradt, Trekking in Peru
The trek route is also included in the Maps.me application, which might be used to geolocate in case of doubts about the path. However, the application obviously does not replace the map, and the phone battery will definitely not last 8-10 days of navigation.
There is virtually no tourist infrastructure along the way. Campsites marked on the maps don’t offer anything except “camping” sign. Only at the Llamacorral campground and then in the Jancapampa hamlet there are small shops where you can buy snacks, drinks and a small grocery (in Jancapampa we have seen, among others, eggs, pasta and canned tuna).
When it comes to food, all you need for trekking can be bought at the local markets and supermarkets in Huaraz or Caraz (if freeze-dried food is the only means to survive on the trek for you, buy it earlier).
Water is easily available every day, but it is necessary to filter, disinfect or boil it.
Fitness and necessary equipment
Trekking itself is quite demanding in terms of fitness, and these difficulties grow significantly when you carry a heavy backpack. The whole usually takes 8-10 days of hiking. In total, the distance is over 140km, and daily elevations are on average 800-1000m. The fatigue accumulates. In addition, there is an important parameter such as altitude. Apart from the start and finish, the whole is in the range of altitude 3600 – 4900mamsl. Therefore, good acclimatization and decent physical preparation are necessary.
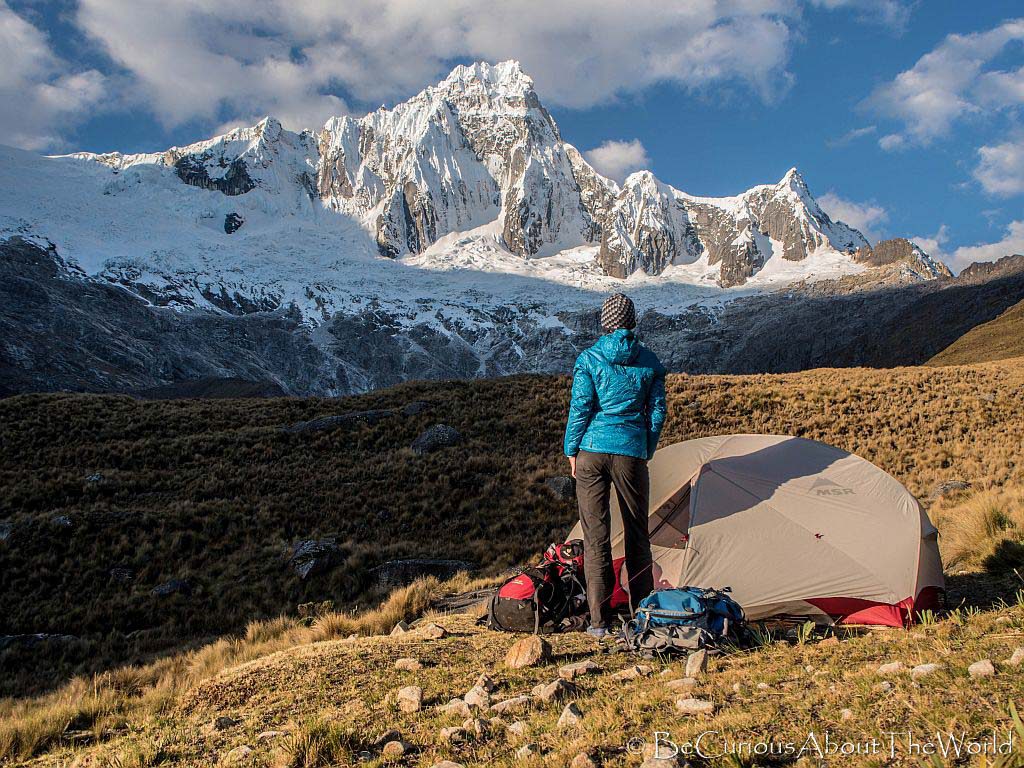
Trekking does not require any special equipment: neither for belaying nor for ice and snow. Good hiking boots (if you have strong ankles, they can be low), layered clothing suited for four seasons, complete camping equipment, cooking, food, first aid kit, sunglasses and cream, good map and compass are essential and indispensable equipment. A Camera, a set of memory cards and batteries are not mandatory but definitely worth having them, as well as trekking poles that will relieve your knees and ensure stabilization on the descent.
Emergency situations and evacuation
There are no organized rescue services in these mountains, so you are on your own. There are many organnised groups on the section overlapping with Santa Cruz, so it’s easier to count on help and horseback transport in case of injury or other random events. In the remainder part of the trek, meetings with people are rarer, and local shepherds usually go on foot and it’s harder to count on their help.
There are limited possibilities to leave the track and go back to civilization. After 3-4 days (going counter-clockwise) you may turn to Vaqueria along the Santa Cruz trail, and then after another 2 days in Jancapampa you can go down to Pomabamba.
Trekking costs and tickets
Tickets to the national park can be purchased at Huaraz or at the entrance to the trail in Cashapampa. We are not sure if this is possible in Hualcayan. The ticket price is 150 sol per person – valid for 21 days. No other fees along the way.
Program of trekking
We decided to go in a counter-clockwise direction and we think it’s the right choice. In our opinion, it is more natural and allows gradual acquisition of heights. Many agencies with pack animals chooses the opposite direction, but a very steep approach from Hualcayan with a backpack full of food did not seem like a good idea to start with.
Our passage program with division into days with comments
1. Cashapampa – Laguna Jatuncocha
You can get to Cashapampa from Caraz by public transport. Buses depart in the morning quite regularly. The ticket price is 10sol. We start from ~ 2900mnpm to finish at ~ 3800mnpm. The best camping options are the Llamacorral (the small store mentioned above), the section between the lakes of Ichiccocha and Jatuncocha or on the banks of Jatuncocha.
2. Laguna Jatuncocha – below the Punta Union Pass
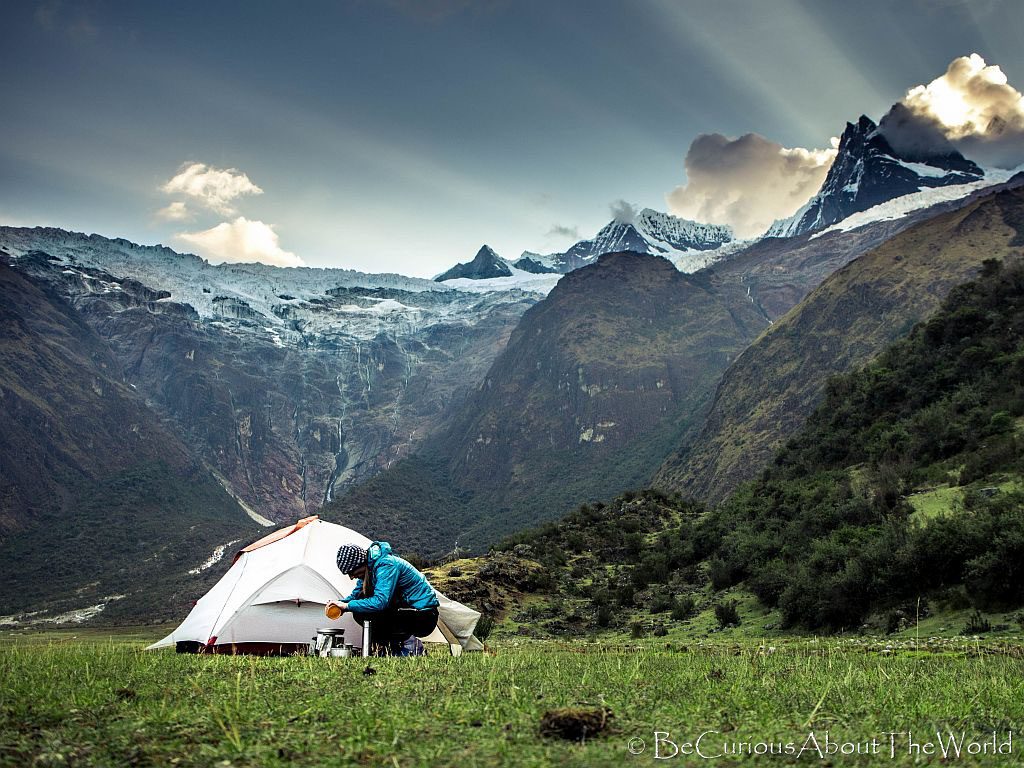
In this section it is worth approaching Alpamayo Base Camp Sur and then Laguna Arhueycocha. A lot of camping options along the way. A series of steep zigzags lead us to the meadows near Alpamayo, from where the views open. At the last switchback there is a stoneman (there is a shortcut – not marked on the map, that is a traverse on the level of ~ 4100mnpm leading directly to the Taullipampa camp without losing altitude). Returning we use this traverse. In addition to Taullipampa itself, good bivouac options are also above this place often occupied by organized groups. The last convenient campsite before Punta Union Pass is located at the crossing of the stream flowing from Sentilo (the last water and two small flats for tents).
3. Below the Punta Union Pass – Laguna Huecrucocha
Demanding day with two strenuous passes. After descending from the Punta Union (4760mnpm), the part of hike overlapping with Santa Cruz ends. From the main path, approximately at the height of the Piramide Lagoon, we turn left into a vague path leading down to the foot of the Alto de Pucaraju (4640mnpm) approach. There is a possibility of camping here. The approach to Alto de Pucaraju is very steep and demanding. On the descent on the pampa, minor orientation problems may appear. The main path is located orographically on the left side of the valley, but going down directly through the central part is also possible (more wet and swampy). Camp at lake Huecrucocha (Wicrococha).
4. Huecrucocha – Janca Pampa
The lowest section of the trail, leading through the Tupatupa pass (4360mnpm). The view is not very interesting, but completion of this stage is a symbolic halfway point and the option to have a beer or two in the Jancapampa store. We feel that it is always better to organize bivouac a bit further from the villages and the extensive meadow of Janca Pampa offers great opportunities for this. If you decide to continue from here, remember that the next camping option will be only after overcoming a steep climb and crossing the stream flowing along Q. Yanajanca.
5. Janca Pampa – Huillca
On this day, the route runs through the Yanacon pass (4610mnpm). As a matter of fact, finding the path did not present any problems. Descent to the Huillca hamlet and continuation along the river by a dirt road. A number of convenient places for camping next to the river bank.
6. Huillca – Laguna Jancarurish
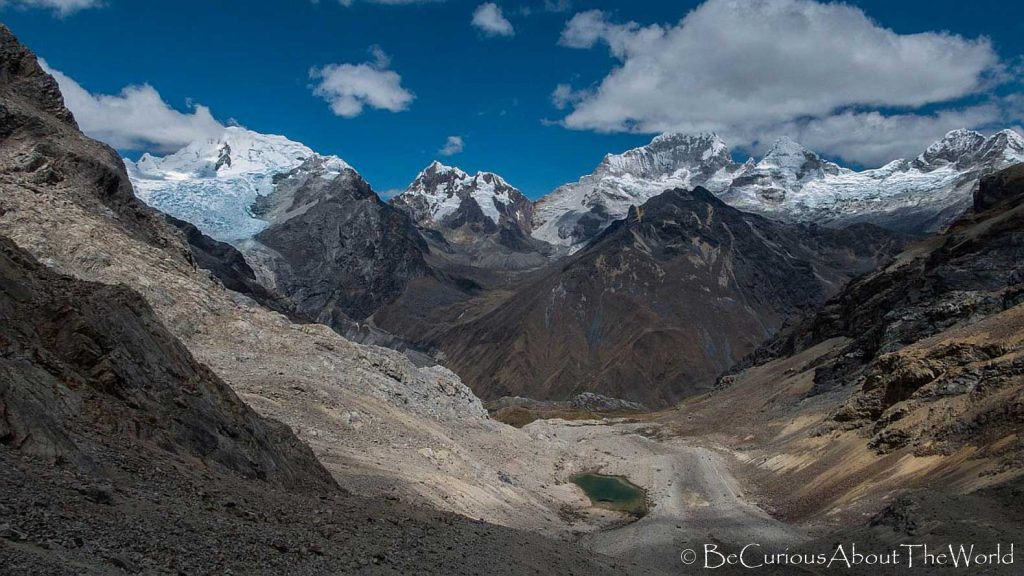
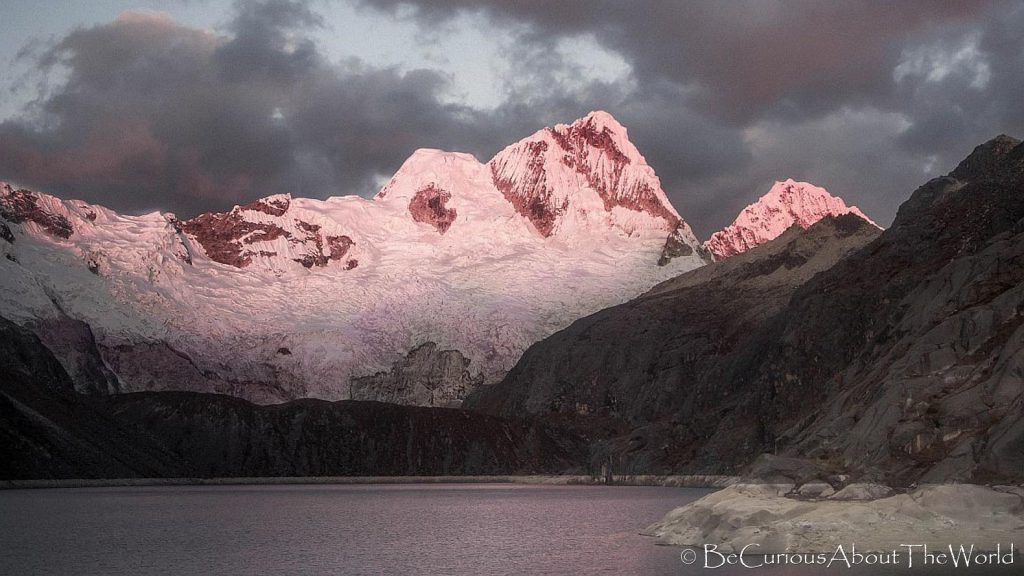
Route through two passes: Mesapata (4460mnpm) and Gara Gara (4830mnpm) with the final at the campsite near Laguna Jancarurish. The climb on Mesapata is easy and not too long. Then follows the traverse straight from the pass to the west to the intermediate level of Q. Mayopampa valley. When it is reached, the trail goes up orographically the left side of the valley, and in the final part it runs with zig-zac on loose scree (orographically right side of the valley). It is by far the most beautiful day of trek. The views behind you from Mesapata and ahead of you from Gara Gara are simply phenomenal. Next part is equally interesting, and the approach to the moraine of Laguna Jancarurish is obligatory on a clear day! There is the possibility of an side trip to Alpamayo Base Camp Norte and to the foot of Nevado Santa Cruz. A beautiful campsite with a view of Alpamayo.
7. Jancarurish Lagoon – Laguna Cullicocha
Demanding day and route through the passes: Vientunan (4770mnpm) and Osoruri (4860mnpm). Long, arduous ascents and the highest point of trek. Overnight in the vicinity of L. Cullicocha and hydroelectric buildings (~4600 meters above sea level). In the case of bad weather, you can pitch a tent in a metal barrack.
8. Descent to Hualcayan
At the end we needed about 3 hours for a steep descent along the aqueduct to the village of Hualcayan. Public transport does not operate here. You can return to Caraz by taxi (price 80-100sol). We managed to go back with a local teacher who lives in Caraz and on school days about 1:00pm leaves the school building taking away passengers. The price: 7sol per person.
Summary
A magnificent, demanding mountain trek that provides a lot of experience and offers beautiful views. After completing it satisfaction is guaranteed. The alternative for it in the area is Huayhuash Circuit which we described here. If you still hesitate and have questions, feel free to contact us.